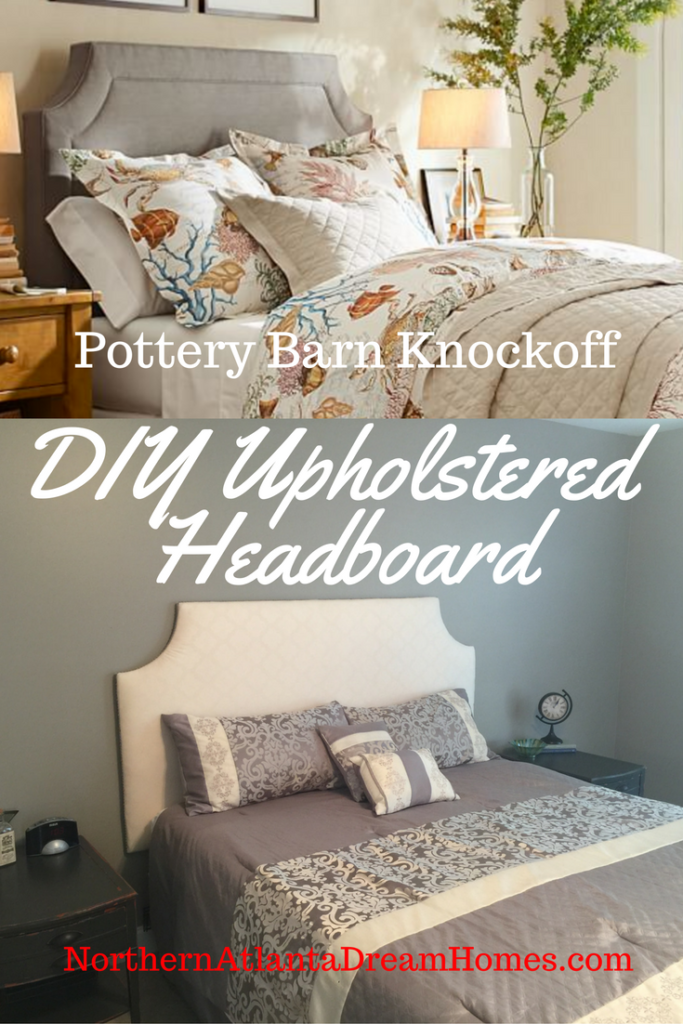
Hi y’all! Here’s another one of my DIY posts. Sometimes I feel like I have a problem – I’m seriously a remodelaholic. But this time I had an excuse! I wanted to make an inexpensive padded headboard to use for staging purposes. As in, if I have a house for sale where the room is pretty much empty and I want buyers to see it as a bedroom. We can use an air mattress on four cardboard boxes all made up with pretty linens and no one will know it’s not a real bed, but with no headboard it’s just boring. But who wants to go buy bedroom furniture for a house you’re selling? Nobody.
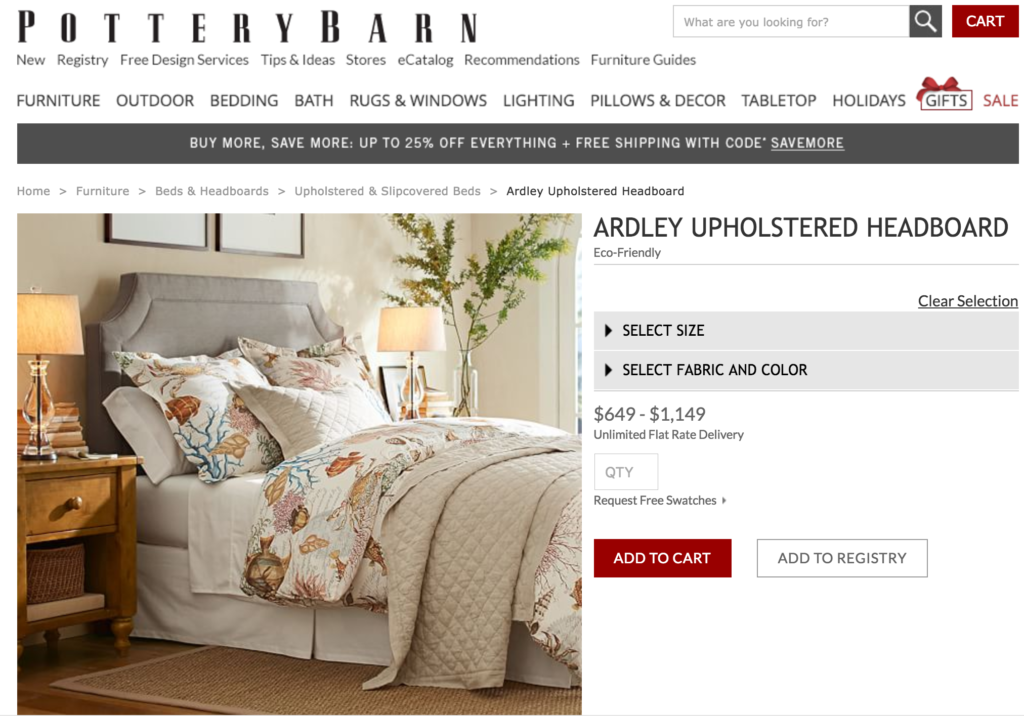
This beauty from Pottery Barn was my inspiration. It’s the Ardley Upholstered Headboard.
I figured there had to be a way to do this easily and on the cheap. And I also figured I’d use my own bed as the guinea pig since we needed a new headboard anyway. So here’s how I made my DIY upholstered headboard.
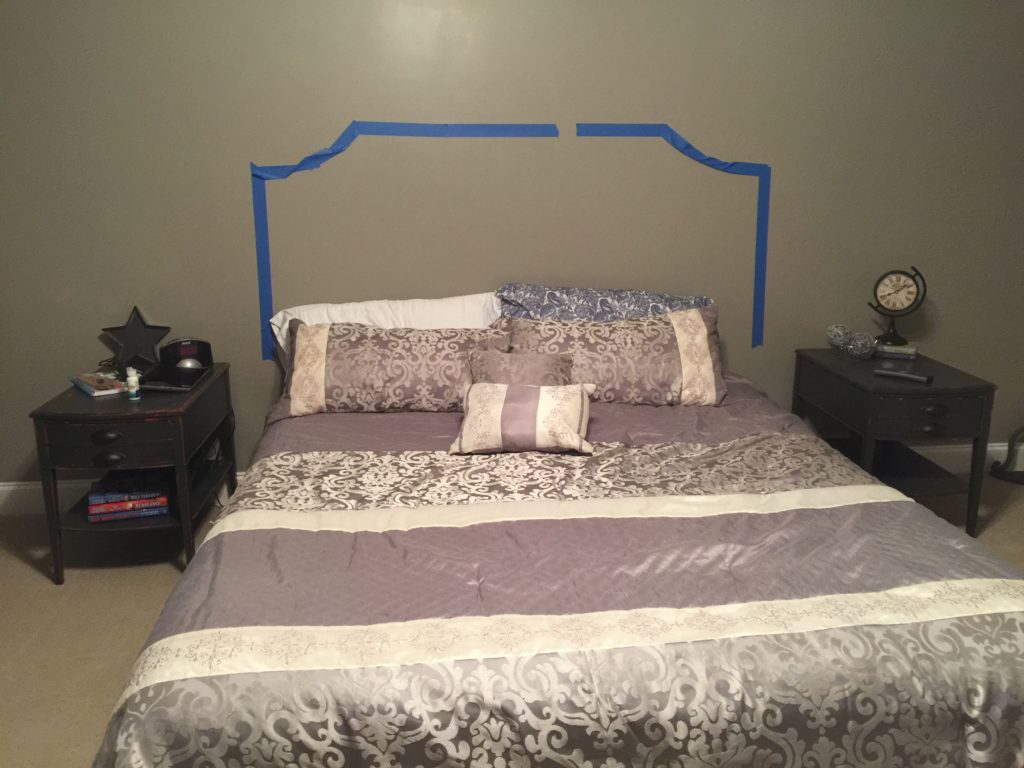
I took painter’s tape and drew an outline of the headboard on the wall. I moved the tape around until I had it where I wanted it. Then I measured it with my tape measure. This is a King and mine measured 40″ tall (in the center) and 78″ wide.
Then I went to the store (ok, stores plural) and got:
- 2 1/2 yards of batting from Joann’s
- 1 curtain that was 84″ long and 45″ wide from Lowe’s (you need fabric at least 6″ wider than your finished headboard)
- 1 queen sized egg crate foam mattress topper from Target
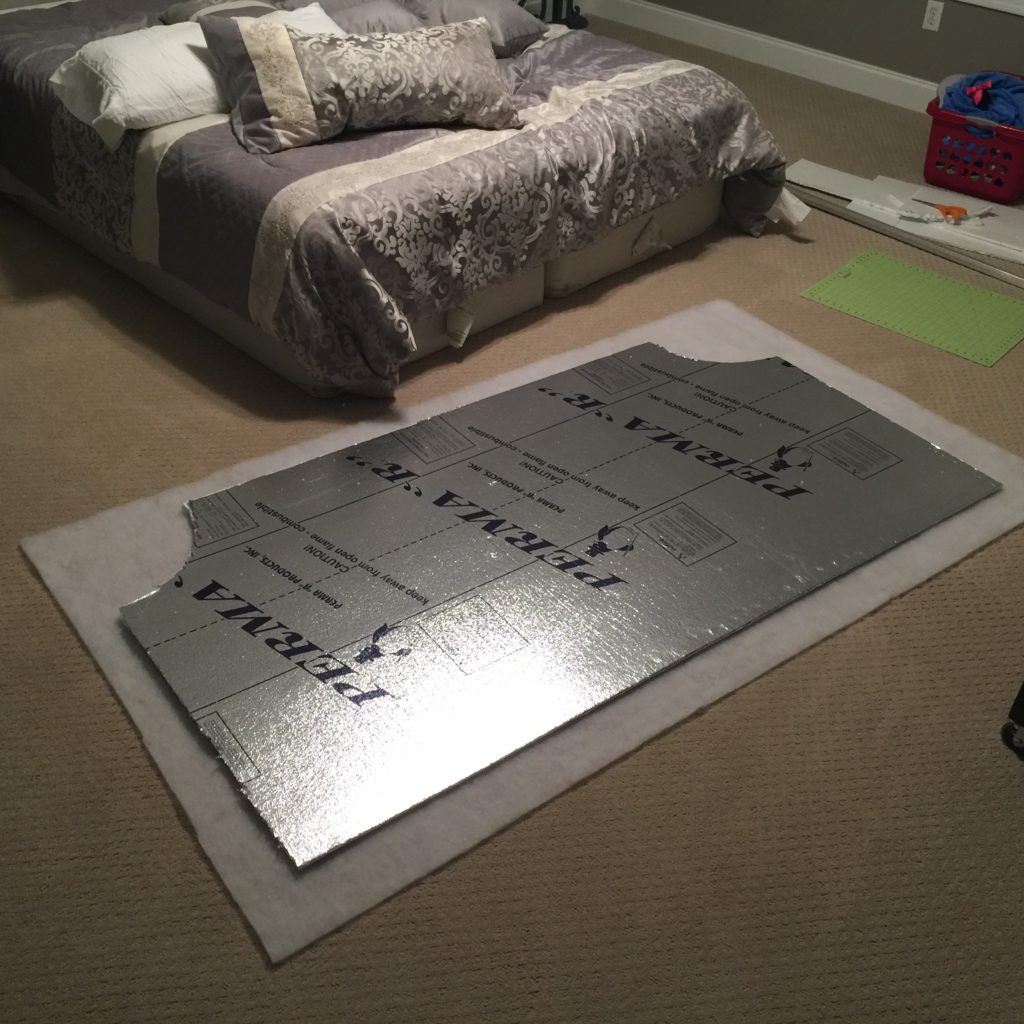
- 1 panel of foam insulation from Lowe’s (it’s white styrofoam with a shiny silver back side and it’s in the aisle where the pink attic insulation is)
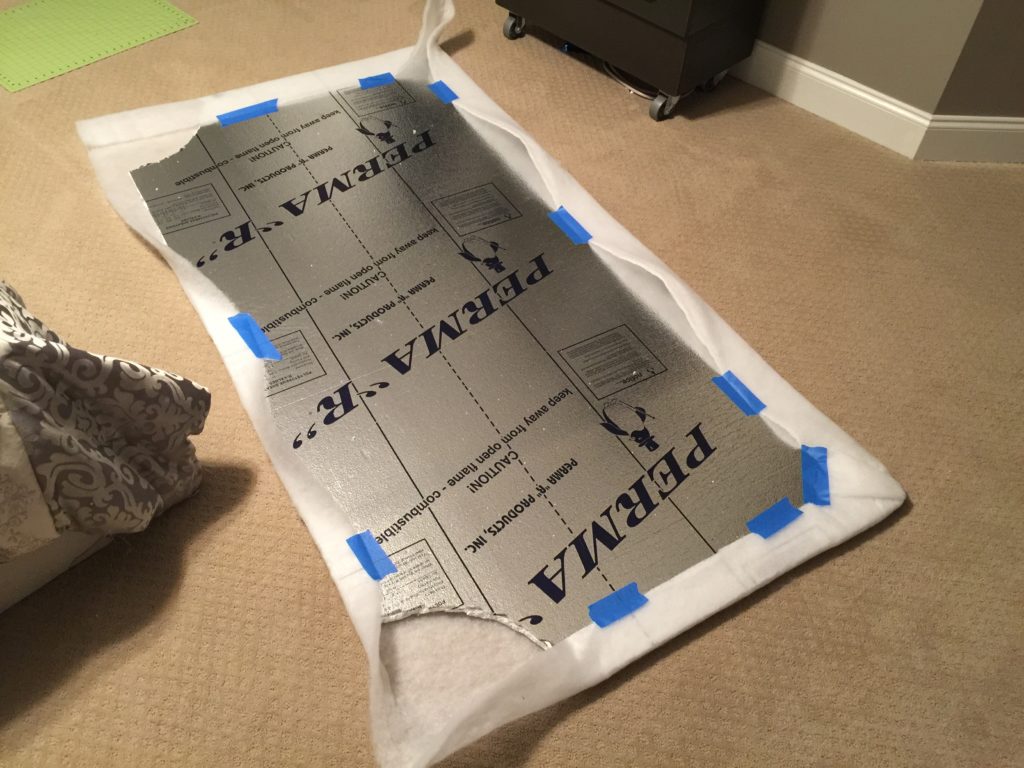
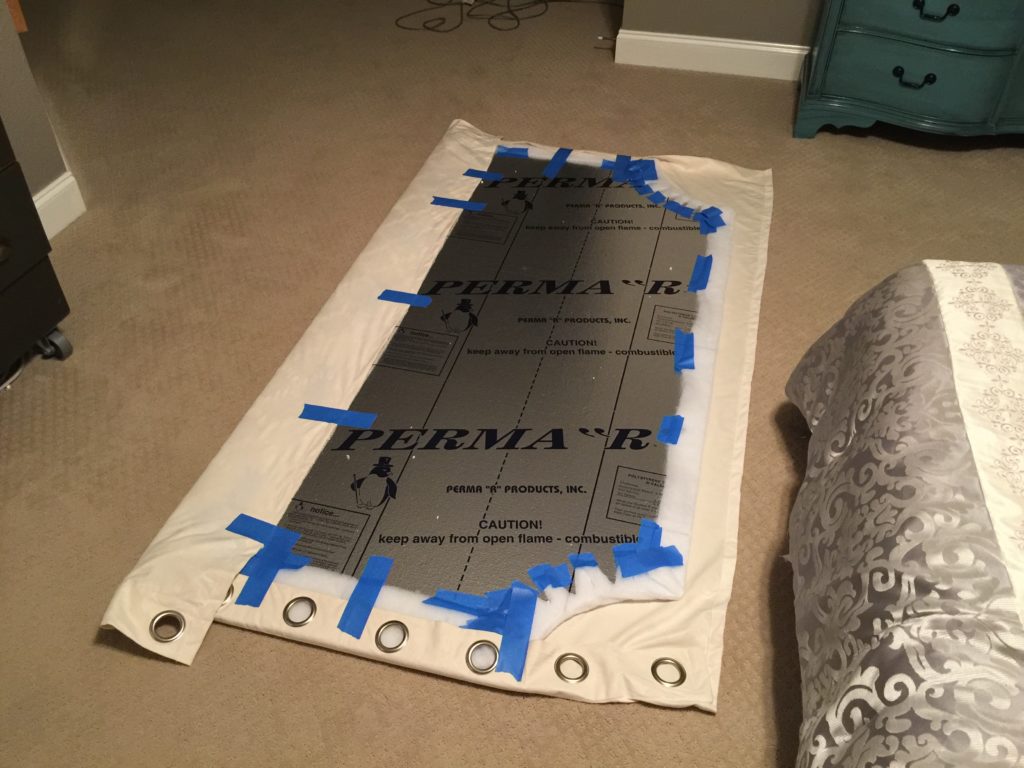
You can obviously buy fabric from the fabric store too, but the curtain was the right color, the right size, and it was cheap. No matter which you choose, be sure it has a pattern that you can turn sideways since that’s how you’ll be using this! Don’t pick something that has a very clear vertical pattern or it’ll look silly if it’s sideways. I used a giant mixing bowl to trace the circular cutouts on the two upper corners. It is very thin and cuts easily with a box cutter or scissors. Then I rolled out the batting and set the foam on top of it.
Then I wrapped the batting around and taped it on the back side just to make sure this was going to look good before stapling it. I wanted to do a “dry fit” first.
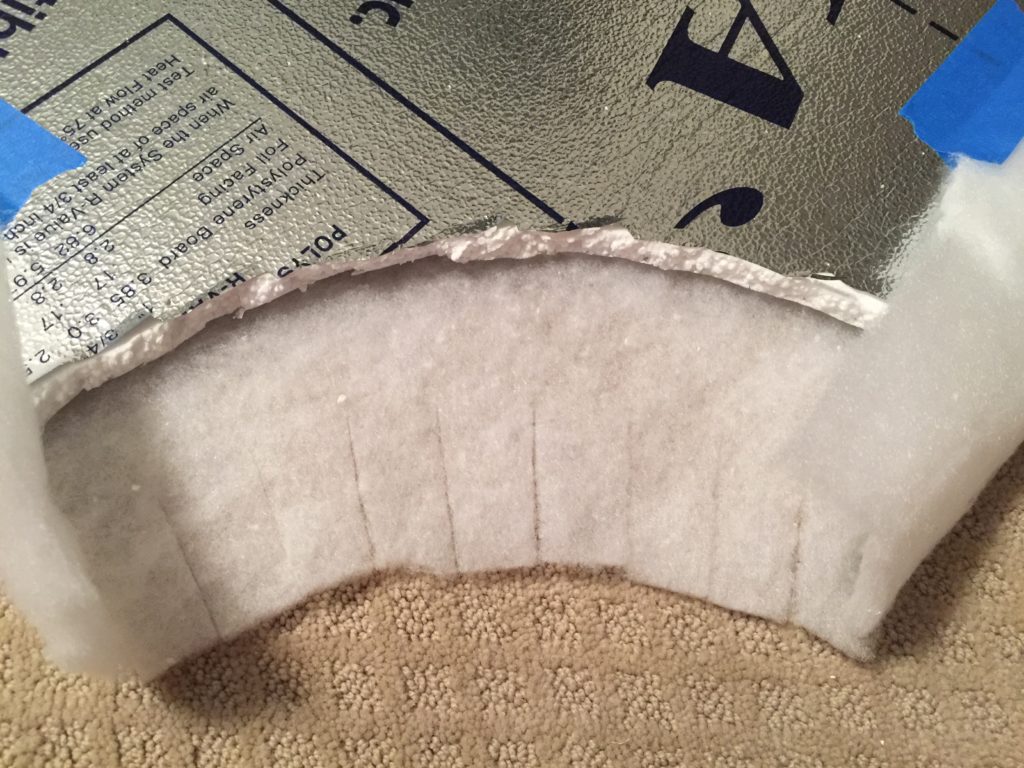
You have to cut a lot of notches around the curve to keep it smooth as you wrap the fabric around the back side.
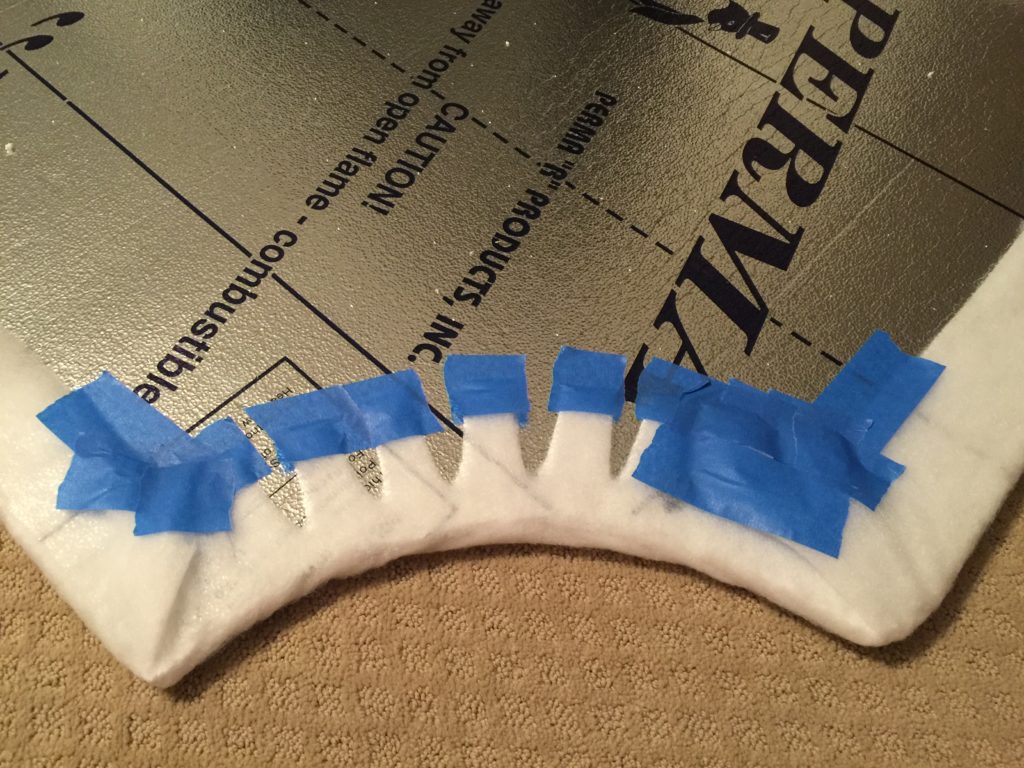
See how nice and smooth it looks?
Then I wrapped the curtain around the batting covered foam, again just using tape. I wanted to make sure it was going to look good before I chopped it up and couldn’t return it! I figured this baby was going back to the store if it was the wrong color or didn’t have enough “oomph.”
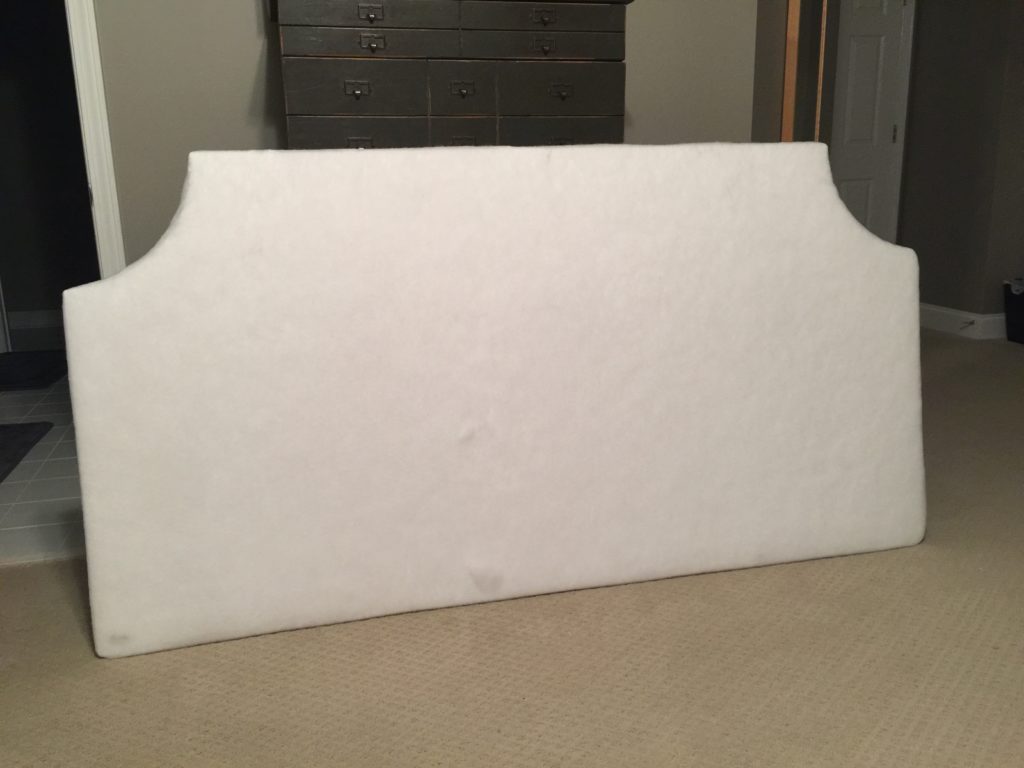
Here is the “dry fit” and I was happy with the general look of the headboard. I didn’t include the foam mattress topper in the dry fit. I was lazy and mostly just wanted to make sure the finished product was matching was I saw in my head. The color was just right and the pattern was subtle enough that it didn’t compete with the comforter. You can see that I didn’t work on the curves since I’d have to bust out the scissors and this was still in the “Should I or shouldn’t I?” stage. I knew the wrinkles would be gone after stretching it really hard and stapling it down.
However, I did not anticipate how floppy it was going to be. The plan was to hang it on the wall with Command hooks or picture hangers so I wanted it to be lightweight, but super flexible was not ideal. I could pick this up myself and it would curve into a giant letter C because it was so flexible. It made it really hard to stretch the fabric without my husband lying on top of the whole thing to keep it in place. Aaaaaand the even bigger problem? The staples wouldn’t hold in the styrofoam. It didn’t have enough to grab onto, I guess.
So we went back to the hardware store, bought a 1/4″ thick sheet of plywood, brought it home, traced the foam board on the plywood, and cut it out. Sadly I got no photos of this process because when hubby takes over, he does it all when I turn my head for 15 minutes. Dang him for being so efficient!
He also cut out the headboard shape onto the foam mattress topper and put it on the plywood over top of the foam insulation board. Then he stapled it all away around the edge. This kept it from sliding around and it also made the edges of the headboard rounded off instead of being kind of square. Again, no photos because he took his one little assigned piece of the project and ran with it while I made lunch.
So if I had any photos to show you at this point, the stacking order was:
- Plywood on the bottom
- Foam insulation on top of the plywood
- Egg crate foam next, which was then stapled to the insulation and plywood all the way around the perimeter
- Batting on top
We had this on two sawhorses in the driveway with the batting on top, plywood on the bottom. I pulled the batting all the way around the other layers to the back side of the plywood. I pulled the center of each side tight and stapled it down with my staple gun just to secure all four sides. Then we flipped it over so it was face down. I figured it would be easier this way since crawling around on the ground under the sawhorses was not my idea of a good time. I went all the way around with my staple gun every 2″ or so. The back side is an eyesore, I’m not gonna lie. But who cares? No one will ever see it.
THEN I IRONED THE CURTAIN. I cannot stress this enough. Pulling the fabric taut will not get rid of wrinkles so be sure to iron it first.
Spread out the curtain (or fabric if you’re using fabric, but 2 1/2 yards of upholstery fabric was quite a bit more than my $25.00 curtain panel) FACE DOWN on the floor.
Put the now batting covered headboard face down on the curtain and try to center it as much as possible. I had grommets on one side so mine was slightly off center to make sure the side with the grommets would wrap all the way around to the back. I pulled and held the fabric in place while my husband stapled.
When we got to the curves we stood it up so that the person in front could smooth the fabric and get the wrinkles out before the person in back stapled it down. Worked really well this way.
When it was all done he screwed two D-rings onto the back like so:

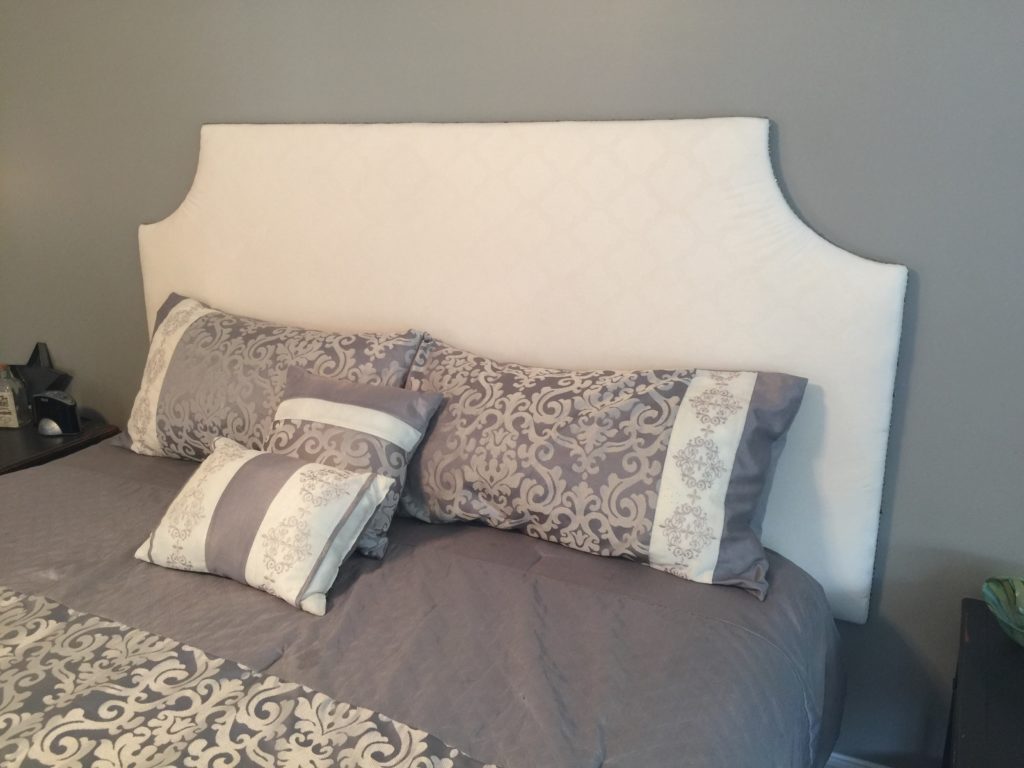
We hung two picture hangers on the wall and hung that baby up. (Picture hangers are terrific because they use very small nails so they don’t require wall anchors and they don’t put huge holes in the wall.) It looked great! But it was missing something. Then I remembered that stitching all the way around on the inspiration photo that’s a couple inches in from the edge. I didn’t want stitching, plus it was too late to sew it now that it was ON the headboard. So I ordered this off of Amazon:
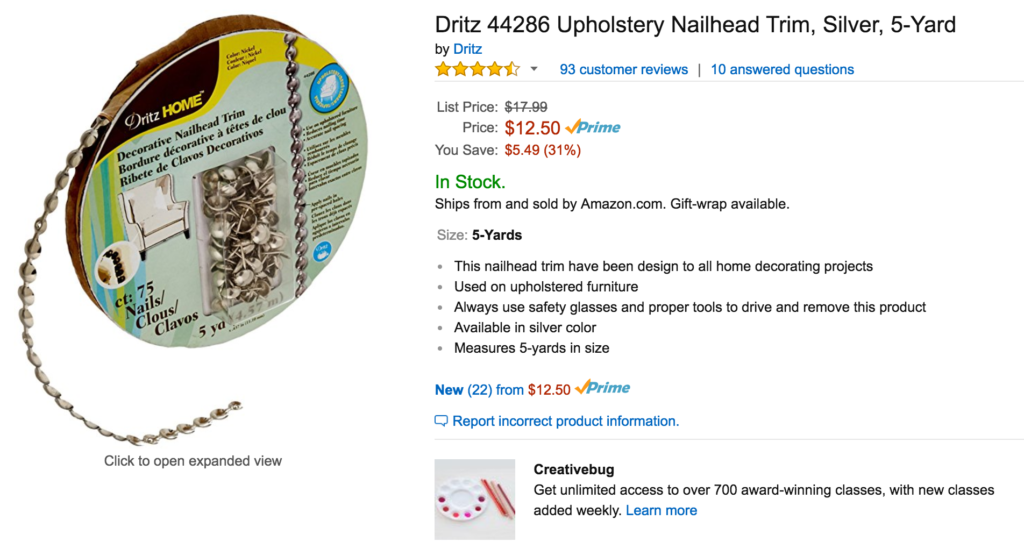
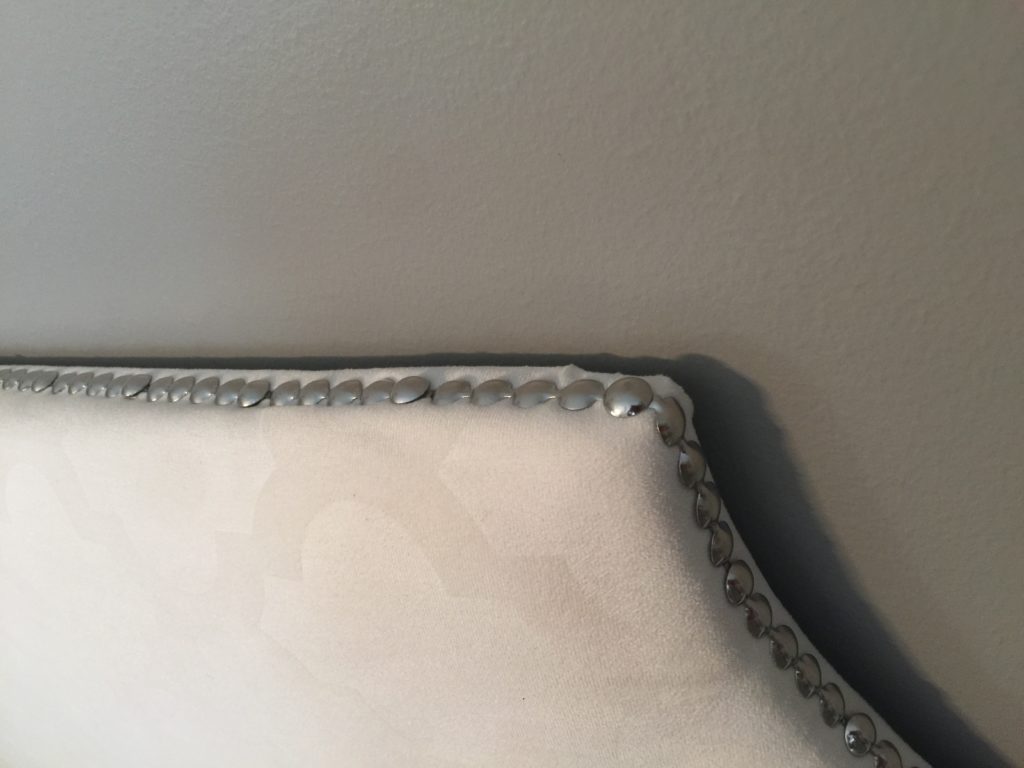
It’s nailhead trim but on a big long roll. You don’t have to hammer each nail in individually. About every 5 nails or so you hammer one in. It was so easy and this roll was plenty long enough to do my king sized headboard. I thought about putting it in the same spot as my inspiration photo but truly, I was worried about getting the lines perfectly straight. Instead, I just went around the sides. It’s not nearly as visible but any mistakes are not as visible either – bonus!
If you look very closely you can see which of the nails are the ones that got hammered in, but from two feet away you absolutely cannot tell. It’s only because of this extreme close up, I promise.
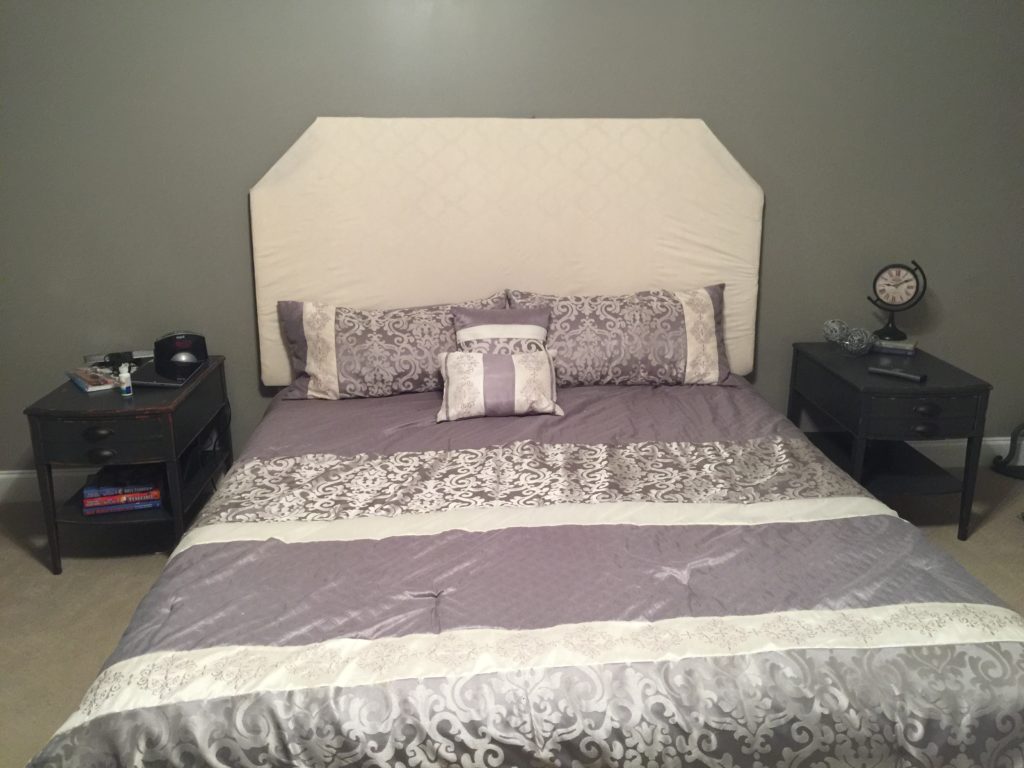
And here are some shots of the finished product. It’s not terribly heavy, maybe 10-15 lbs. Two picture hangers hold it with no problem since we got the ones that said they hold 35 lbs each. It’s about an inch thick at most. It’s large and awkward to move by yourself but come on, it’s a king size so it’s huge anyway. I chose a neutral ivory so that it would coordinate with our bedding but I also seriously considered a painter’s drop cloth since they look a lot like linen and again, they’re dirt cheap.
To make this headboard thicker we could have used thicker plywood or extra foam, but I didn’t want to add to the weight (or the cost, quite frankly.)
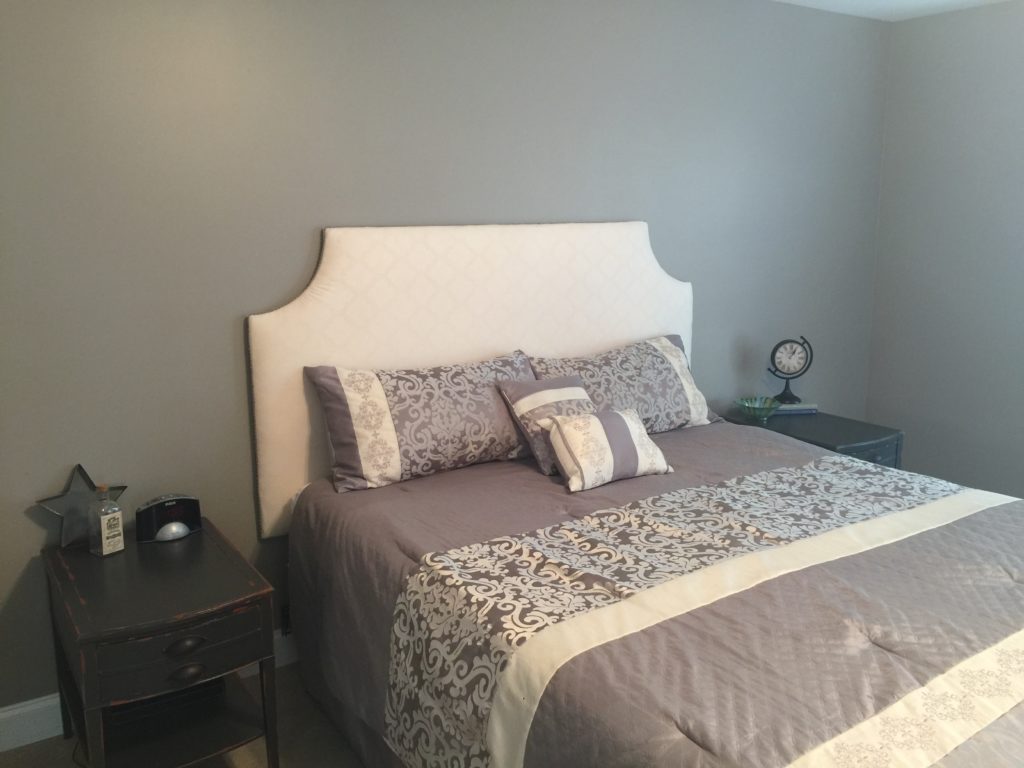
Where did we come in pricewise? Less than $100! Not bad for a king size DIY upholstered headboard!
- 4×8′ sheet of 1/4″ plywood: $17
- 4×8′ sheet of foam insulation: $8
- One 84″ long and 45″ wide curtain panel: $25
- Egg crate mattress topper: $20
- Batting: Approximately $10 for 2 1/2 yards
- Nailhead trim: $13
$93.00 TOTAL
Now I need to learn to stage the bed with 50 pillows and blankets so it would look like the Pottery Barn photo.
Next up! What to put above the two nightstands? Mirrors? Artwork? Stay tuned…
-Karin
About the Author: DIY Upholstered Headboard – Pottery Barn Knockoff, was provided by Karin Carr, an authority on Cherokee County real estate and a leader in the field of real estate blogging. Karin has helped literally helped almost 200 families buy and sell homes since 2005. If you are in the market to BUY or SELL a home, she can be reached via email at [email protected] or by phone at 404-855-1807.
If you need help buying or selling outside of the Atlanta area, I can help you find a great Realtor®. Just ask!
Are you thinking of selling your home? I’m very good at marketing homes to sell quickly, and for more money. If you’re a first-time home buyer then you’ll be in good hands. I’ve helped countless first-time home buyers through the entire process of buying that first home! I have a real passion for helping folks buy and sell homes here in the great state of Georgia and I would love to connect with you!
I help people buy and sell real estate in the following north Georgia cities: Acworth, Ball Ground, Canton, Kennesaw, Woodstock, White, Roswell, Milton, Alpharetta, Dallas, Powder Springs, and the surrounding areas.
